
Disclaimer: Entertainment News Today. This site provides arts and entertainment content for informational purposes only.
A DIY gaming room offers more than just a place to play—it’s a personalized space that reflects your style and enhances your gaming experience. By taking the DIY route, you can customize every aspect to fit your preferences and budget. Plus, the satisfaction of building your own setup adds an extra layer of enjoyment to your gaming sessions.
Creating your dream gaming room doesn’t have to drain your wallet. With a bit of creativity, some DIY spirit, and smart planning, you can transform any space into an immersive gaming sanctuary. Whether you’re a PC gamer, console enthusiast, or retro arcade fan, this guide will walk you through affordable upgrades you can build yourself.
1. Planning Your Space: Start with a Blueprint
Before diving into purchases and installations, it’s crucial to assess your available space and plan accordingly. This planning stage saves you money and frustration in the long run. Knowing your layout helps avoid overbuying, misplacing furniture, or crowding your space with unnecessary gear. It’s tempting to start shopping right away, but mapping out your ideal gaming environment helps you prioritize needs versus wants. Ask yourself what your main use case is—PC gaming, console lounging, streaming? Each goal requires different setups. Even a small corner can become a powerful setup if planned efficiently. Think ahead so your build evolves with you.
Key Considerations:
- Room Size: Measure your space to determine what furniture and equipment will fit comfortably.
- Natural Light: Consider the lighting in your room. Natural light can enhance the ambiance, but may cause glare on screens.
- Power Outlets: Ensure there are enough outlets for your equipment, or plan for power strips and cable management solutions.
Tip: Sketch a layout of your room, marking where each piece of equipment will go. This visual aid can help in organizing and optimizing your space.
2. DIY Furniture: Build or Repurpose
Furniture can be one of the most significant expenses in setting up a gaming room. However, with some DIY skills, you can build or repurpose furniture to suit your needs. Making your own furniture gives you total control over size, materials, and finish. Plus, it’s often more affordable than buying ready-made gaming desks or stands. Repurposing existing items—like converting a kitchen table into a dual-monitor desk—can also give your space a custom feel. Don’t overlook IKEA hacks either; they offer cost-effective solutions that can be tailored to gaming. Building furniture lets your room grow with you over time.
Ideas:
- Custom Desk: Build a desk using affordable materials like plywood and metal brackets. Customize it to fit your space and equipment.
- Shelving Units: Repurpose old bookshelves or create wall-mounted shelves to store games, controllers, and collectibles.
- Seating: Upgrade an old office chair with new padding and fabric, or build a gaming chair using foam and durable materials.
Tip: Check out online tutorials and community forums for step-by-step guides on building gaming furniture.
3. Lighting: Set the Mood
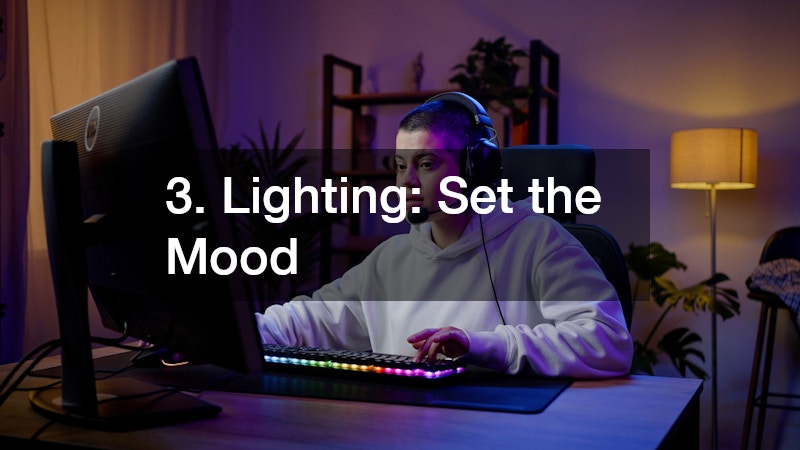
Lighting plays a crucial role in creating an immersive gaming environment. Fortunately, there are budget-friendly options to enhance your room’s ambiance. Good lighting reduces eye strain during long sessions, boosts mood, and makes your setup look epic. Whether you’re chasing a sleek RGB vibe or a cozy gaming cave atmosphere, the right lights make all the difference. Placement also matters—backlighting monitors can create depth and lessen screen glare. Try combining task lighting for function with ambient lighting for atmosphere. Since most lights are now USB-powered or voice-activated, installation is easy. A well-lit room turns gameplay into a visual experience.
Affordable Lighting Solutions:
- LED Strip Lights: Install behind your monitor or desk for a futuristic glow.
- Smart Bulbs: Use color-changing bulbs to set different moods for various games.
- DIY Lamps: Create custom lamps using recycled materials and LED bulbs.
Tip: Consider using lighting to highlight specific areas or features in your gaming room, such as shelves or artwork.
4. Soundproofing: Keep the Peace
Soundproofing your gaming room can enhance your experience and prevent disturbing others. Immersive sound is a key part of gaming, especially with surround sound systems or high-quality headsets. But that power can also spill into the rest of the house. If you live with others or share walls with neighbors, reducing noise is not just polite—it’s essential. The good news? You don’t need expensive studio-level foam. Everyday items like curtains, bookshelves, and thick rugs double as sound barriers. Sealing door gaps, adding wall hangings, or even DIY acoustic panels can make a difference. Quiet on the outside, thunder inside.
DIY Soundproofing Methods:
- Foam Panels: Install acoustic foam panels on walls to absorb sound.
- Heavy Curtains: Use thick curtains to dampen noise and block external sounds.
- Rugs and Carpets: Place rugs on the floor to reduce echo and absorb sound.
Tip: Even simple additions like door seals and draft stoppers can significantly reduce noise leakage.
5. Personalize with Decor
Adding personal touches to your gaming room can make it feel truly yours. Your space should reflect your love for gaming—whether that’s through your favorite titles, franchises, or custom creations. Decor isn’t just visual flair; it enhances emotional connection to your space. It could be a poster of your all-time favorite RPG, hand-painted pixel art, or even a themed wall mural. Try rotating your displays seasonally or as you explore new games. Many gamers also enjoy collecting figures or limited-edition swag. A few smart display cases can showcase these treasures while keeping them safe and organized. Make it uniquely you.
Decor Ideas:
- Posters and Art: Display posters of your favorite games or custom artwork.
- Collectibles: Showcase action figures, models, or memorabilia on shelves.
- Themed Decor: Choose a theme (e.g., sci-fi, fantasy) and decorate accordingly.
Tip: DIY decor projects, like painting your own game-inspired art, can add a unique touch to your room.
6. Cable Management: Stay Organized
A clutter-free space enhances both aesthetics and functionality. When cables are everywhere, they can distract from the gaming vibe and make it harder to maintain your equipment. Cable management also improves airflow, which can prevent overheating and improve your gear’s lifespan. Velcro ties, zip ties, and adhesive clips are cheap tools that keep cords tucked away. Routing cables through furniture or cable sleeves not only hides the mess, but it also protects wires from wear and tear. It also helps when upgrading your rig since you won’t be detangling a spaghetti monster every time. Clean cables = clean plays. Keep your wires in check.
Cable Management Solutions:
- Cable Sleeves: Bundle cables together for a neat appearance.
- Cable Clips: Secure cables along walls or under desks.
- Labeling: Label each cable to easily identify it when needed.
Tip: Regularly check and adjust your cable management to accommodate new equipment or changes.
7. Optimize Your Setup
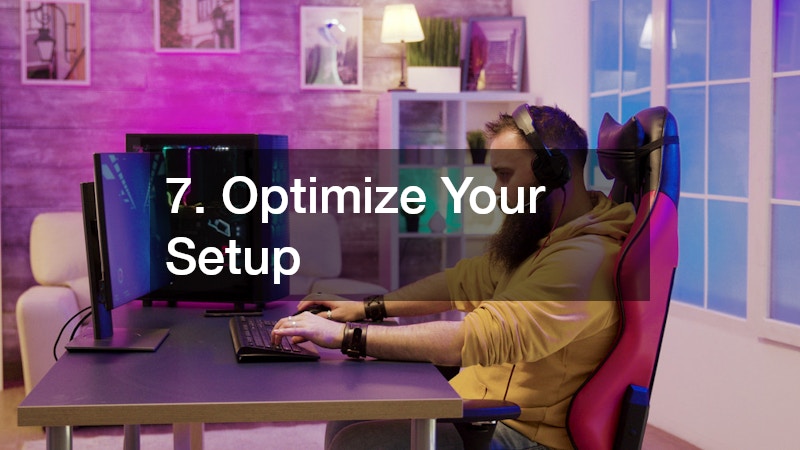
Ensure that your gaming setup is both comfortable and efficient. An optimized setup doesn’t just look good—it helps you play better. Monitor height, chair comfort, and desk space all influence your physical health and in-game focus. Avoid straining your neck or wrists during long marathons. Little tweaks like a monitor riser, wrist rest, or ergonomic mouse can make a huge difference. Don’t forget airflow—your PC and consoles need space to breathe. A cramped setup leads to overheating and slower performance. Try a small fan, better cable spacing, or a cooling pad. Your setup should support the player just as much as the play.
Setup Tips:
- Monitor Placement: Position your monitor at eye level to reduce strain.
- Ergonomic Accessories: Use ergonomic keyboards, mice, and chairs to enhance comfort.
- Ventilation: Ensure your equipment has proper airflow to prevent overheating.
Tip: Regularly clean your equipment to maintain performance and longevity.
8. Budget-Friendly Tech Upgrades
Enhancing your gaming experience doesn’t always require expensive equipment. Smart shopping and strategic upgrades can boost performance without draining your wallet. Start with what’s slowing you down—maybe a better SSD for faster load times or a monitor upgrade for smoother frames. Second-hand markets, seasonal sales, and refurbished tech offer serious savings. Platforms like eBay or certified refurbished stores give gamers access to gear that’s still in top shape. Prioritize based on gameplay style: competitive FPS players may value frame rate, while story-driven gamers may want a sharper display. Max out your performance where it matters most to you.
Affordable Tech Upgrades:
- Second-Hand Gear: Purchase used monitors, keyboards, or consoles from reputable sources.
- DIY Repairs: Learn basic repair skills to fix or upgrade existing equipment.
- Open-Source Software: Utilize free software for streaming, recording, or enhancing gameplay.
Tip: Stay updated on sales and discounts from retailers to snag deals on gaming gear.
9. Multi-Purpose Spaces: Maximize Utility
If space is limited, design your gaming room to serve multiple functions. Small apartments, dorms, or shared homes make dedicated rooms a luxury. But that doesn’t mean your space can’t be awesome. Multi-functional rooms just require more thoughtful planning. Consider foldable desks, modular shelving, or rolling carts for gear. Use blackout curtains or room dividers to mentally separate “game time” from work or rest. Furniture like futons or bean bags can shift easily between casual lounge mode and serious raid setups. The goal is flexibility. With smart layouts and clever storage, your one-room wonder can do it all.
Multi-Purpose Ideas:
- Guest Room Combo: Incorporate a fold-out bed or futon for guests.
- Home Office Integration: Use your gaming desk for work or study during the day.
- Entertainment Center: Set up your gaming room to also serve as a movie or music room.
Tip: Use furniture and decor that can easily transition between functions to maintain a cohesive look.
Conclusion: Level Up Your Space
Building your own gaming room is a rewarding project that combines creativity, functionality, and personal expression. By implementing these affordable DIY upgrades, you can create a space that enhances your gaming experience without breaking the bank. Remember, the best gaming room is one that reflects your personality and meets your unique needs.